Creating your first gm_flatgrass
阅读
2023-07-30更新
最新编辑:Tairikuookami
阅读:
更新日期:2023-07-30
最新编辑:Tairikuookami
Introduction
Before doing anything check here first; Getting Started With Hammer
The purpose of this guide is to jump into Hammer and start creating something, in this case, we will be recreating gm_flatgrass step-by-step.
For more documentation and tutorials on Source 2 mapping, refer to the Mapping Resources Page.
Note: This guide uses the version of Hammer that is included in Half-Life: Alyx
TO-DO: Add step or remake step a step to include removing unnecessary faces.
Knowing your tools
If you plan on uploading your map, Create your map by following Getting Started With Hammer
OR
‘File’ > ‘New’ ( CTRL + N ) to open a new map and then ‘File’ > ‘Save’ ( CTRL + S ) to save as gm_flatgrass. (This may cause compiler to complain that the vmap is not inside one of your created addons.)
Selection Modes
From left to right we will be using the following modes: Edges ( 2 ), Faces ( 3 ), Objects ( 5 )
These three selection modes are the bare minimum to create this map, you can switch between them by pressing the number keys that represent their position.
After picking the Selection Mode, you may also choose which Tool to interact with.
Tools
You can find tools on the left side, in this guide we will use the following:
| Icon | Tool | Description |
|---|---|---|
| Selection Tool ( ⇧ SHIFT + S ) | Select geometry elements, objects and groups. You can also use this to resize them. | |
| Move Tool ( T ) | Move your selection along the X Y Z axes. | |
| Rotate Tool ( R ) | Rotate your selection along the X Y Z axes. | |
| Entity Tool ( ⇧ SHIFT + E ) | Place any type of point entity such as: player spawns, AI spaws, logic entities, props | |
| Block Tool ( ⇧ SHIFT + B ) | Create basic geometric shapes such as: Quad, Block, Cylinder, Spike, Sphere | |
| Clipping Tool ( ⇧ SHIFT + X ) | Slice geometry, cuts must be made in the 2D viewport and confirmed with ENTER. |
See also: https://files.facepunch.com/wiki/files/314/8d90a83c8940111.png
All of the rest
Crash course on everything else we will be using on this guide and a short description. I suggest you look at this video tutorial to help with the layout.
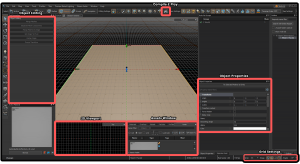
- Object Editing: Depending on the Tool and your Selection Mode, this section will have different options to interact and modify the selected geometry.
- Compile & Play: Opens the compile tool to run your map, use Fast Compile while working.
- 2D Viewport: Shows an orthographic view of the map from any direction. You can shift views by pressing Top ( F2 ), Front ( F3 ), Side ( F4 )
- Assets Window: Props, Materials, Prefabs etc… You can drag and drop from the Asset Browser that opens when running the workshop tools as well.
- Object Properties: While having an object or point entity selected you can modify its scale, position, rotation, and any properties it might have.
- Grid Settings: When moving or resizing an object, it will snap to the smallest amount of units you have selected. Most of the time we will use 64, 32, 16, and 8 units.
W A S D to move the camera in the viewports, Scroll to Zoom-in/out and hold Right-Click to rotate.
Making the map step-by-step
Step 1:
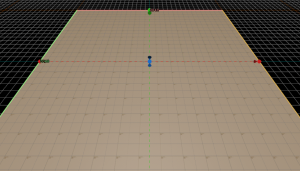
With the Block Tool ( SHIFT + B ), select Quad in the Object Editing window, make a plane that is 2048x2048 units. The bigger your map is, the longer compiling takes, so for now we’ll keep it small and enlarge it when we’re ready to finalize.
You can use the Object Properties to center the plane in X: 0; Y: 0
Step 2:
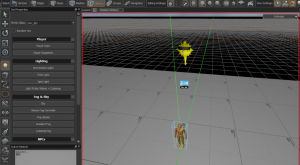
With the Entity Tool ( SHIFT + E ) selected, from the Object Editing window place the Player Start, Sky, and Environment Light. Make sure to rotate the light having the arrow face down using the Rotate Tool ( R )
Step 2.5:
Slap a grass texture on the plane and do a Fast Compile, if all you wanted was a literal flatgrass then you have finished the tutorial.
Step 3:
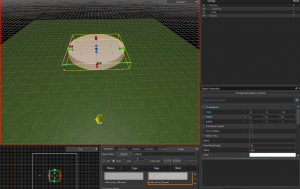
With the Block Tool ( SHIFT + B ), select Cylinder in the Object Editing window, make a cylinder that is 512x512 units and has 64 sides, place it in the center.
Step 4:
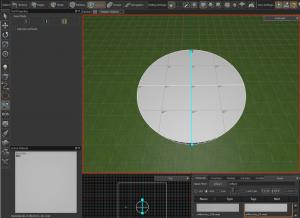
With the Clipping Tool ( SHIFT + X ) and working in the 2D Viewport, slice the cylinder in half by pressing ENTER to confirm, then slice in quarters.
In the Object Editing window remember to have the third Keep Mode selected.
Step 5:
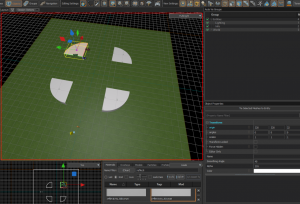
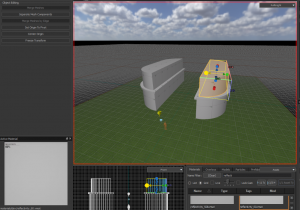
While in Objects Selection Mode ( 5 ) use the Move Tool ( T ) to separate the sections an equal distance from each other.
Step 6:
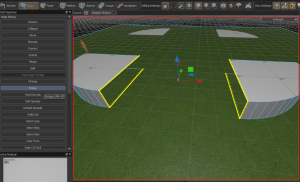
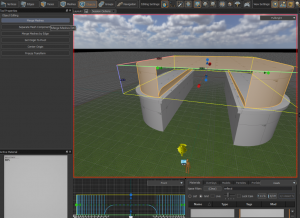
While in Edges Selection Mode ( 2 ) use the Selection Tool ( SHIFT + S ) to select all the edges on the side which is missing a face of two opposite sections. To select multiple edges at once you can hold SHIFT while clicking on the edges.
After you have all the edges selected like in the picture Bridge ( B ) them and, through the Object Editing window, select only 1 Step (Only 1 straight face will be generated) then press ENTER to confirm.
Repeat on the other side.
Step 7:
Select the edges of the remaining faceless side by either Double Clicking or Select Loop ( L ) in the Object Editing window after selecting one of the edges.
Fill Hole ( P ) to cover the face, repeat on the other side.
Step 8:
While in Objects Selection Mode ( 5 ) select both foundations and use the Selection Tool ( SHIFT + S ) to make them taller by dragging the arrow facing upwards.
Step 9:
Using the Move Tool ( T ) and while holding SHIFT, move both foundations up to clone them.
We will be using these clones to create the concrete slabs that separate the two foundations.
Step 10:
While in Objects Selection Mode ( 5 ) select both slabs and use the Selection Tool ( SHIFT + S ) to make them shorter by dragging the arrow facing downwards. I suggest changing the Grid’s size to a smaller value like 16.
Using the 2D Viewport to help, place the slabs on top of the bottom foundations with the Move Tool ( T ).
While selecting one slab at a time, slightly make them larger on each side to create an overhang.
Step 11:
Using the Move Tool ( T ) and while holding SHIFT, move the bottom foundations up to clone them. Resize these new top foundations one-by-one to make them shorter and just a bit thinner on each side to accentuate the concrete slab’s overhang.
While in Faces Selection Mode ( 3 ) select the inner 2 faces of the top foundations and Delete ( DEL ) them.
These brick foundations will have a wide arch that connects them.
Step 12:
With the Block Tool ( SHIFT + B ), create a cylinder with 32 faces that is as wide as the top foundation’s height (In my case they are 160 units).
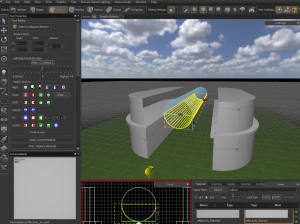
With the help of the 2D Viewport, Rotate ( R ) the cylinder 90° and place it exactly in the center of the two top foundations.
Using the Selection Tool ( SHIFT + S ) resize the cylinder to be exactly as deep as the top foundations.
Step 13:
While using the 2D Viewport and the Faces Selection Mode ( 3 ), select the bottom half of the cylinder and Delete ( DEL ) it.
Delete ( DEL ) the front and back faces as well.
Step 14:
While in Objects Selection Mode ( 5 ) select the half cylinder Flip Faces ( F ).
Step 15:
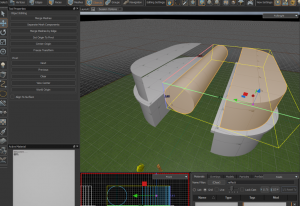
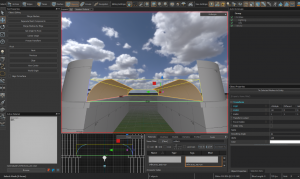
Using the Clipping Tool ( SHIFT + X ), cut the object in half and with the help of the 2D Viewport Move ( T ) them close to the top foundations and on the concrete slabs just like in the picture.
You might want to lower the Grid’s size for this, I’ve used 8.
Step 16:
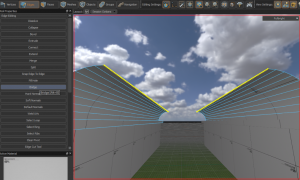
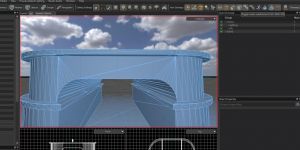
In Edges Selection Mode ( 2 ), select the arc’s top opposing edges and Bridge ( ALT + B ) them.
Step 17:
In Edges Selection Mode ( 2 ), select the top foundation’s upper edges and Bridge ( ALT + B ) them together.
In Objects Selection Mode ( 5 ), select the top foundation and the two arcs and Merge ( M ) the meshes together. (Reminder: Hold SHIFT to select multiple objects)
Step 18:
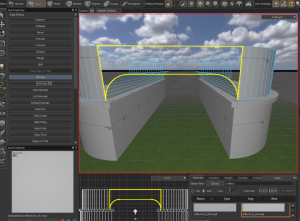
While in Edges Selection Mode, select one of the edges belonging to the missing face and Select Loop ( L ) or Double-Click to include all of them.
Fill Hole ( P ) to create the missing face and repeat on the other side.
TO-DO: Change this step to avoid creating a n-gon. Extrude and stitch instead
Step 18.1:
Step 18 will create what is known as a ‘ngon’, it is generally looked down on by 3D Modelers as it may lead to problems with lighting, collisions, and subdivisions. While there is no proof that a flat static ngon in Source 2 causes any problem, we will show how to fix this. You may skip this step if you do not care about what other people think about you and your mapping skills.
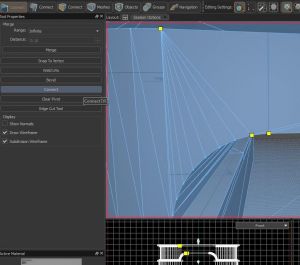
To help visualize the position of all vertices we need to Toggle mesh subdivision view ( CTRL + SHIFT + F6 ).
Step 18.2:
In Vertices Selection Mode ( 1 ), select one of the top vertices and two bottom adjacent vertices. (Hold SHIFT to select multiple points at once)
Connect ( V ) them together, this will create a new face that has only 3 edges.
Step 18.3:
Here is a video to show the workflow, all of this can be done in less than 2 minutes if you have quick and steady hands. 314/8d914bf36d4c1f6.mp4 You can check if you finished by going into Edges Selection Mode ( 2 ) and sweeping the face to compare the mesh.
Step 19:
Duplicate the first two concrete slabs with the Move Tool ( T ) in Objects Selection Mode ( 5 ) and place them on the top brick foundation.
Select the two inner faces in Faces Selection Mode ( 3 ) and Delete ( DEL ) them, then select all edges of the missing face in Edges Selection Mode ( 2 ) and Bridge ( ALT + B ) them together.
Step 20:
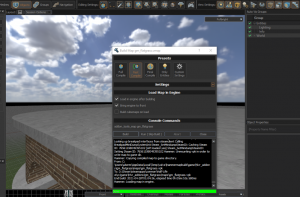
Drag some textures from the Assets Browser, resize the grass plane and do a Fast Compile to check out your map!
Note: If you are getting an error regarding “(map path) is outside of the directory required for game content:” see; Getting Started With Hammer
Note2: If you are on a PC with a CPU that has efficiency Cores Windows sometimes tries to use only Efficiency cores for compiling. To fix this go into your Task Manager>Details select sandbox_dev and vrad3 rightclick>Set Affinity and select all CPU cores except the efficiency cores (usually the last ones are your efficiency Cores).
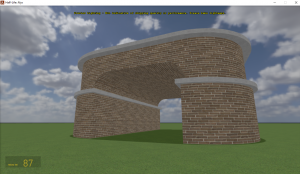
Result
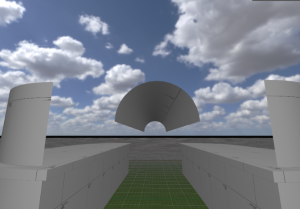
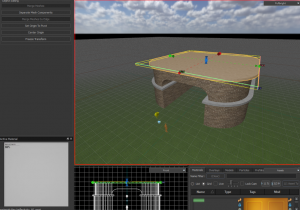
This may look like a discount gm_flatgrass but what you learned here were the very basics to Hammer.


 沪公网安备 31011002002714 号